
Monday, May 13, 2013
this isn't exactly a craft but...
Saturday, September 1, 2012
Heart Ring
Inspiration:

Attempt at DIY:

It might be easier to say just click on this, but it's much more fun if I get to explain what I did to make the heart ring in the middle. It was pretty simple, but obviously it's not professional quality. The wire I used was easy to bend (there's probably an official term for that but I don't know it) so with a pair of needle-nose pliers I could shape it. I wrapped the ring part of it around the pliers too to make it round enough (is this making sense? I'm really trying!) to fit my finger. And then, my favorite- I hot glued it together because the edges were a little sharp. That's it! I put it on and haven't taken it off since.
Lightning Bolts


Inspired by the Urban Outfitters lightning bolt shirt, I cut up a white tee and Sharpie tie-dyed it black and purple. It wasn't as dark as I had hoped, so I (no surprises here) spray painted it black. It still probably wasn't dark enough but I wanted to wear it already! I printed out a lightning bolt, cut it out, and spray painted white around it. I'm pretty happy with how it turned out because it was free and when I went to a black-light party, it really stood out. Success!!I really like lightning. Like, really. It's because I like storms (hence my name http://570rm.blogspot.com) and I like symbols and lightning is a pretty cool symbol for a storm. I like lightning and storms so much that I've developed a collection of pictures on Pinterest: http://pinterest.com/doubleyellow/storms/ and made a soundcloud: http://soundcloud.com/570rm. So I'm not exaggerating when I say I really like storms and lightning. I also really like metal. When I saw this
on Pinterest, I had an idea. Lightning bolt. Metal. Jeans. Done.


...maybe I have a problem.
To attach the metal lightning bolt to the pocket, I cut out a pocket-shaped piece of an old t-shirt and hot glued the lightning bolt to it. Then I stitched that fabric to the jeans pocket. It kind of came off a little bit so I used Gorilla glue between the metal and the t-shirt material. It stayed and looked almost as cool as I'd pictured :)
Update: I can never wear these because the metal pulled away from the hot glue when I moved, so now the sharp points will catch on other fabrics and make it uncomfortable to sit down. So they look cool but are pretty much useless= IMPRACTICAL
Fortune Teller Lantern
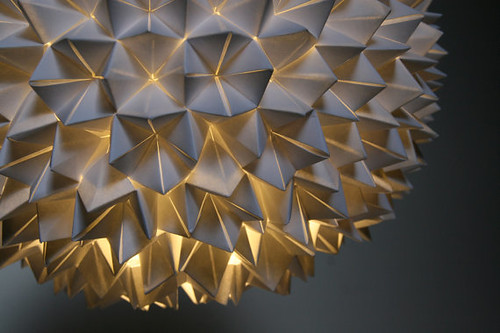


Those were the examples of fortune teller lanterns that I was trying to copy. That's what it should look like...

Well, close enough. It's just a little smaller. I think the difference is that I didn't use a Chinese lantern for structure. Actually, all you see there (besides the light & cord & stuff) is paper and glue! It was incredibly cheap to make, and if you were ever an elementary school girl, you already know how to make cootie-catchers. If you don't, Wikipedia does: http://en.wikipedia.org/wiki/Paper_fortune_teller
I realize this isn't exactly a tutorial because I didn't take pictures as I was making it, but I can try to explain what I did. You start with like a billion cootie catchers (not really, but a lot) and fit them inside each other- if you lay 4 down, you can put a 5th in the middle and connect them all together. Glue them in place and let them dry.
The hardest part for me was trying to fit the lighting fixture inside after I was done making the lantern, so I'd recommend buying a lighting kit for hanging lanterns http://www.homedepot.com/buy/lighting-fans/fluorescent-lighting/westinghouse/6-ft-cord-set-with-snapin-pigtail-with-candelabra-base-socket-and-cord-switch-38404.html#.UELUIEKFn6l and adding it /setting it up before you finish the lantern. Also, you might need a way of holding it up- mine didn't work perfectly. Anyway, once you have a strip of connected fortune tellers, you can wrap that around on itself. If you want, you can add a few at the top and bottom to make it look nicer.
Then hang it up!!
My take on a chinese origami light:
My take on a chinese origami light:


Stealing from Ren Ariel Sano
First of all:
http://allthegoodgirlsgotoheaven.blogspot.com/2012/03/diy-mara-hoffman-inspired-woven-tee.html
 She can tell you how to do it right.
Second of all:


http://allthegoodgirlsgotoheaven.blogspot.com/2012/03/diy-mara-hoffman-inspired-woven-tee.html

Second of all:

That's my attempt.
And then, since it was an old shirt with a logo on the front, I added a pocket. And a new logo!

Do you like it? I did it with spray paint. Apparently those symbols stand for the elements (fire, water, air, earth) so I just arranged them to look cool. I'm kind of a fan.
Oh, and I really liked Ren Ariel Sano's original idea, so I did it again.

I'm sure you couldn't guess that this was my tie-dye/dip-dying phase right?
Saturday, August 25, 2012
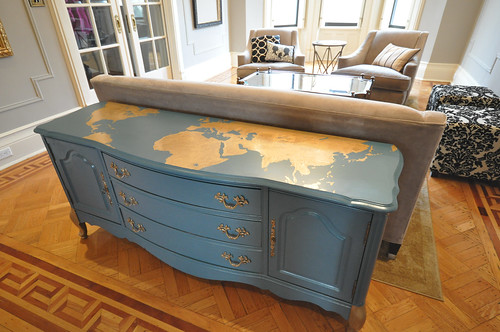
map of the world jeans
It might just be me, but there's something cool about maps of the world, right? Especially when it involves crafting :) And because I spend too much time on the internet, I've found plenty of examples of map crafts!

by kevin van aelst

Globe Chandelier by Benoit Vieubled


keno map rug


Sunday, August 19, 2012
Spraypaint American Flag Shirt
I've been crafting like mad lately, and the slightest inspiration will set me off. When I came across this lovely little gem,
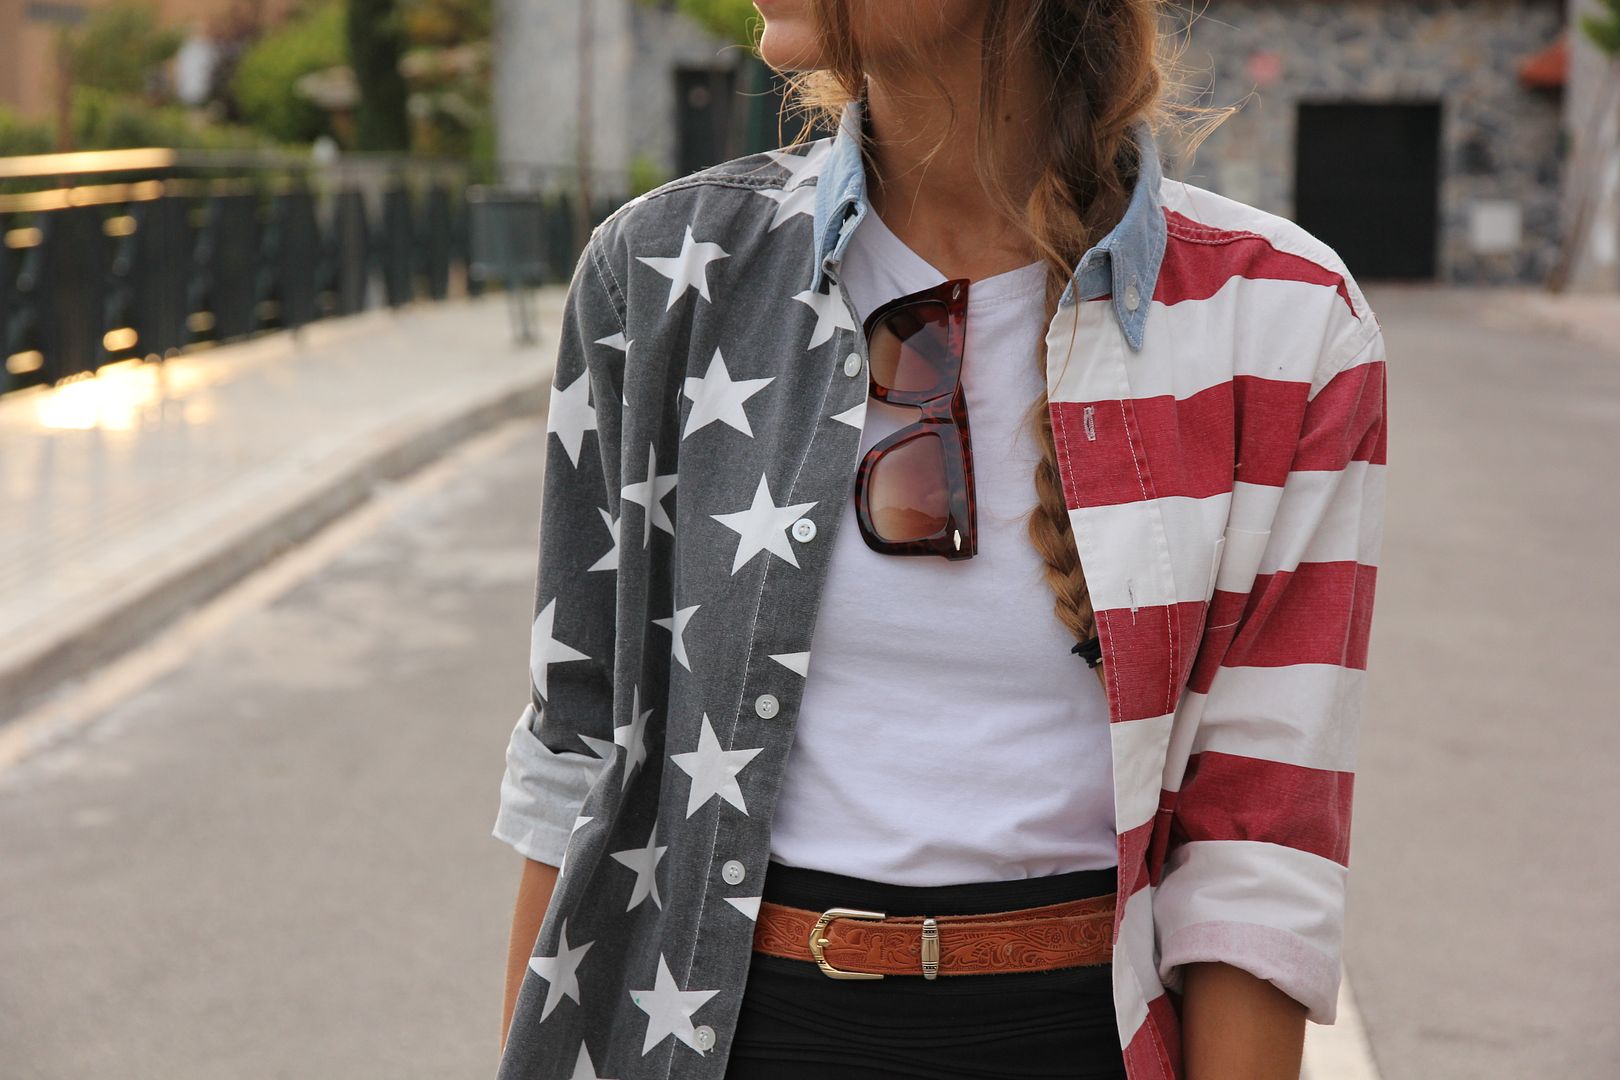
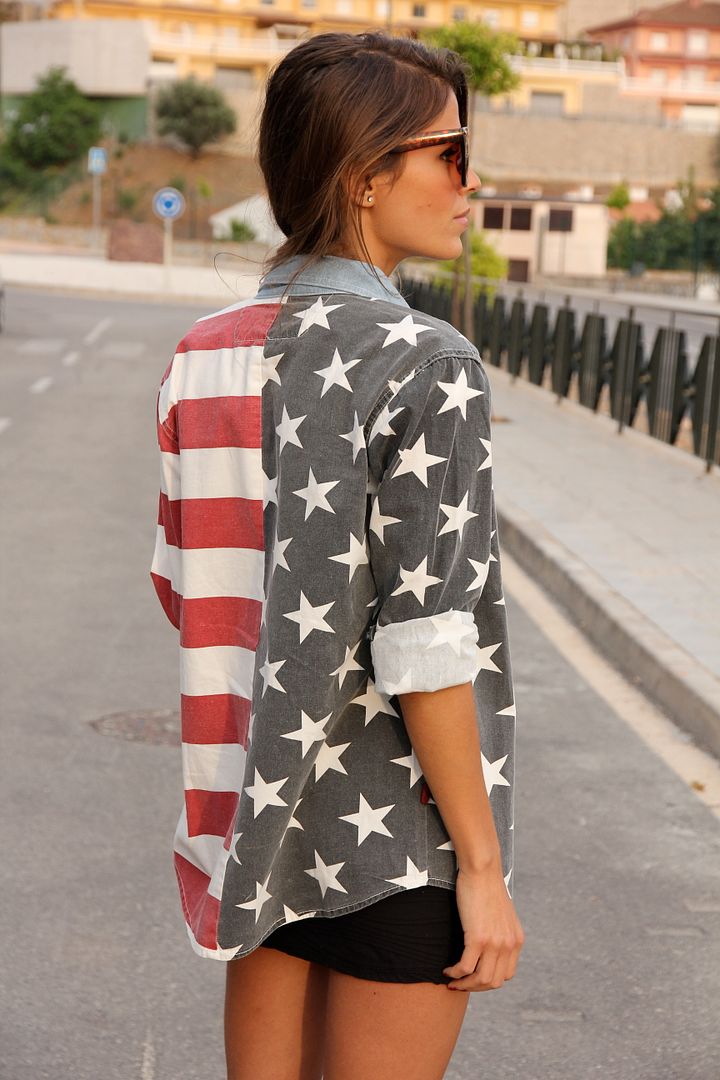


http://www.seamsforadesire.com/2012/05/usa.html
I really just couldn't help myself...


and the best part was that I could use packing tape for the stripes! (which makes my life, and yours if you try this, really easy. yay!) oh also it was awesome that my dad didn't mind me uh "borrowing" his shirt :) for the stars, I just printed them, cut them out, and taped them on. and I got the line down the back almost perfect by folding the shirt while I spraypainted it. (btw, I use spray paint on clothes A LOT and it works really well. that seems to surprise people, but Krylon even advertises using theirs on clothing). Not sure if I prefer the original, but that's not a DIY, so it's at least a little exciting that my homemade version doesn't look like a joke next to it.
Subscribe to:
Posts (Atom)